Filter is the building blocks for creating & genrating timesheets in Timesheets for Jira®. Peojects, Users, date and more are all types of layers you can add and combine to generate a timesheet.
Project select
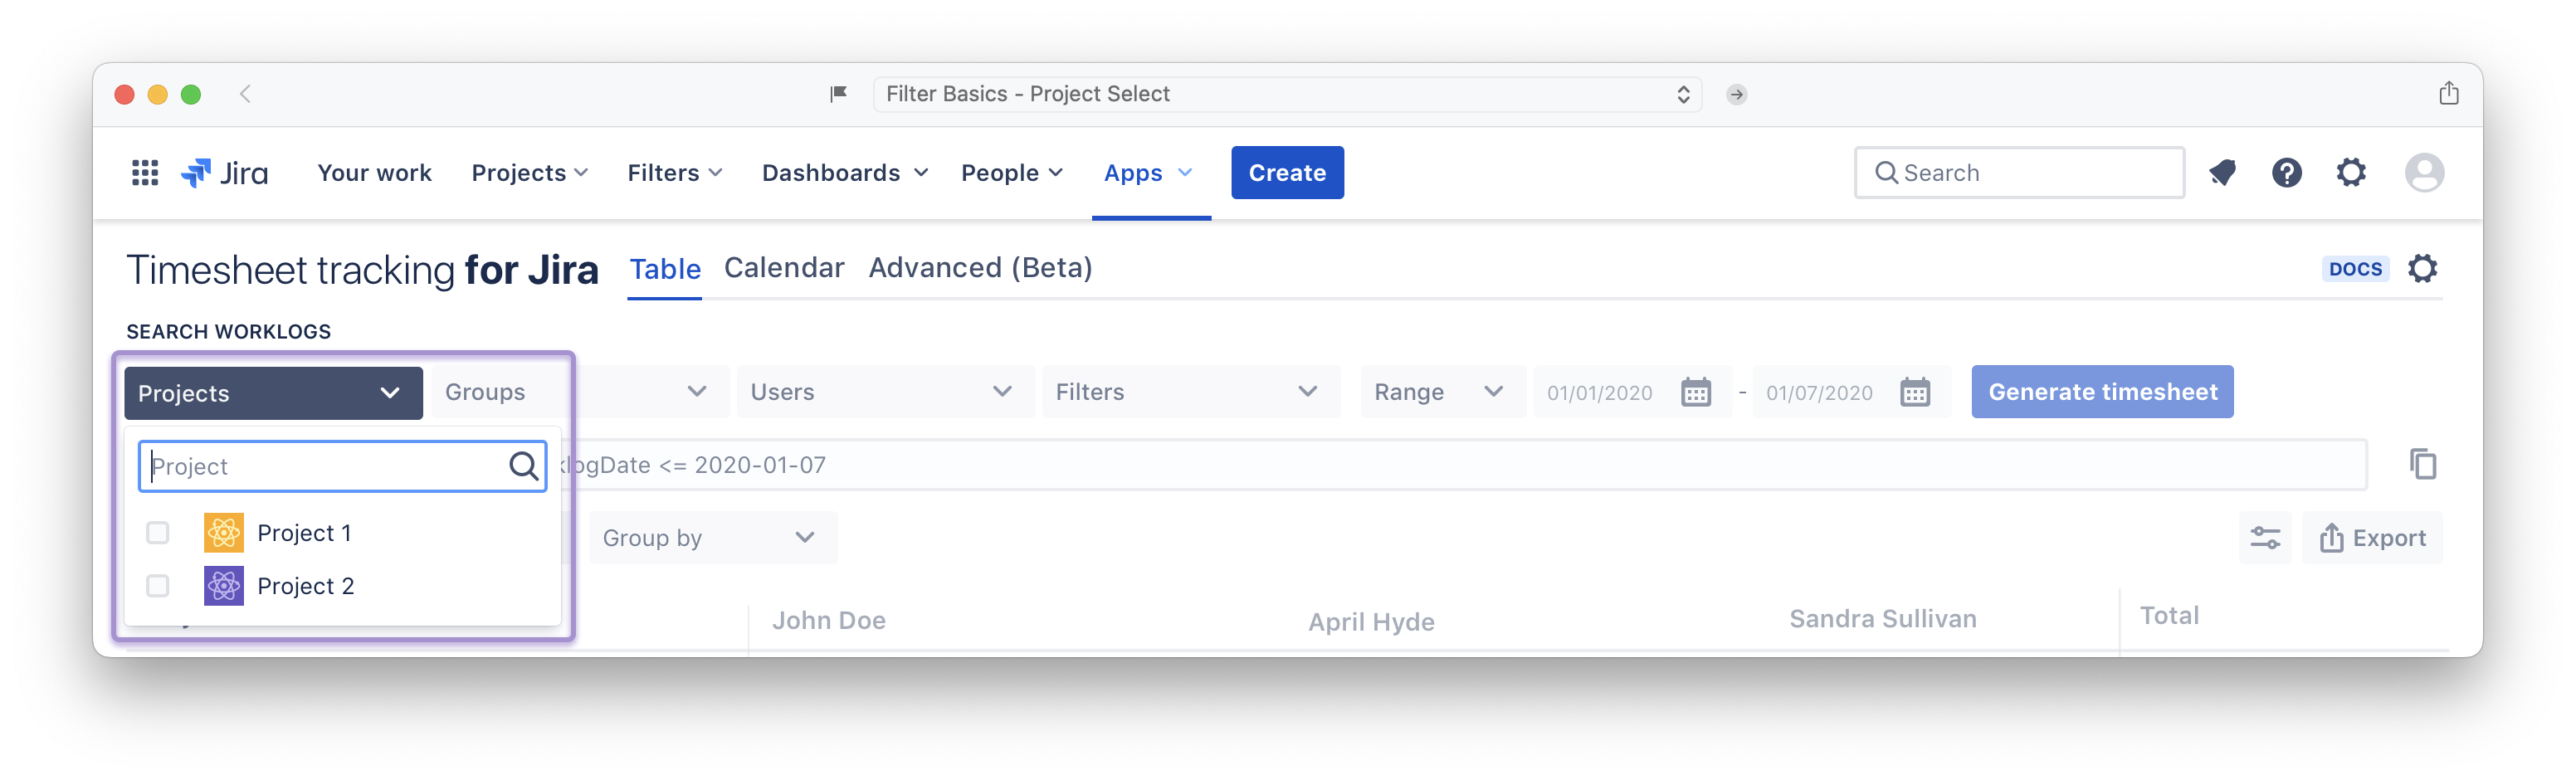
By defaults, all JIRA instance projects will be included, select one or more projects in this field. You have semi automatic search to speed up your selection.
Group select
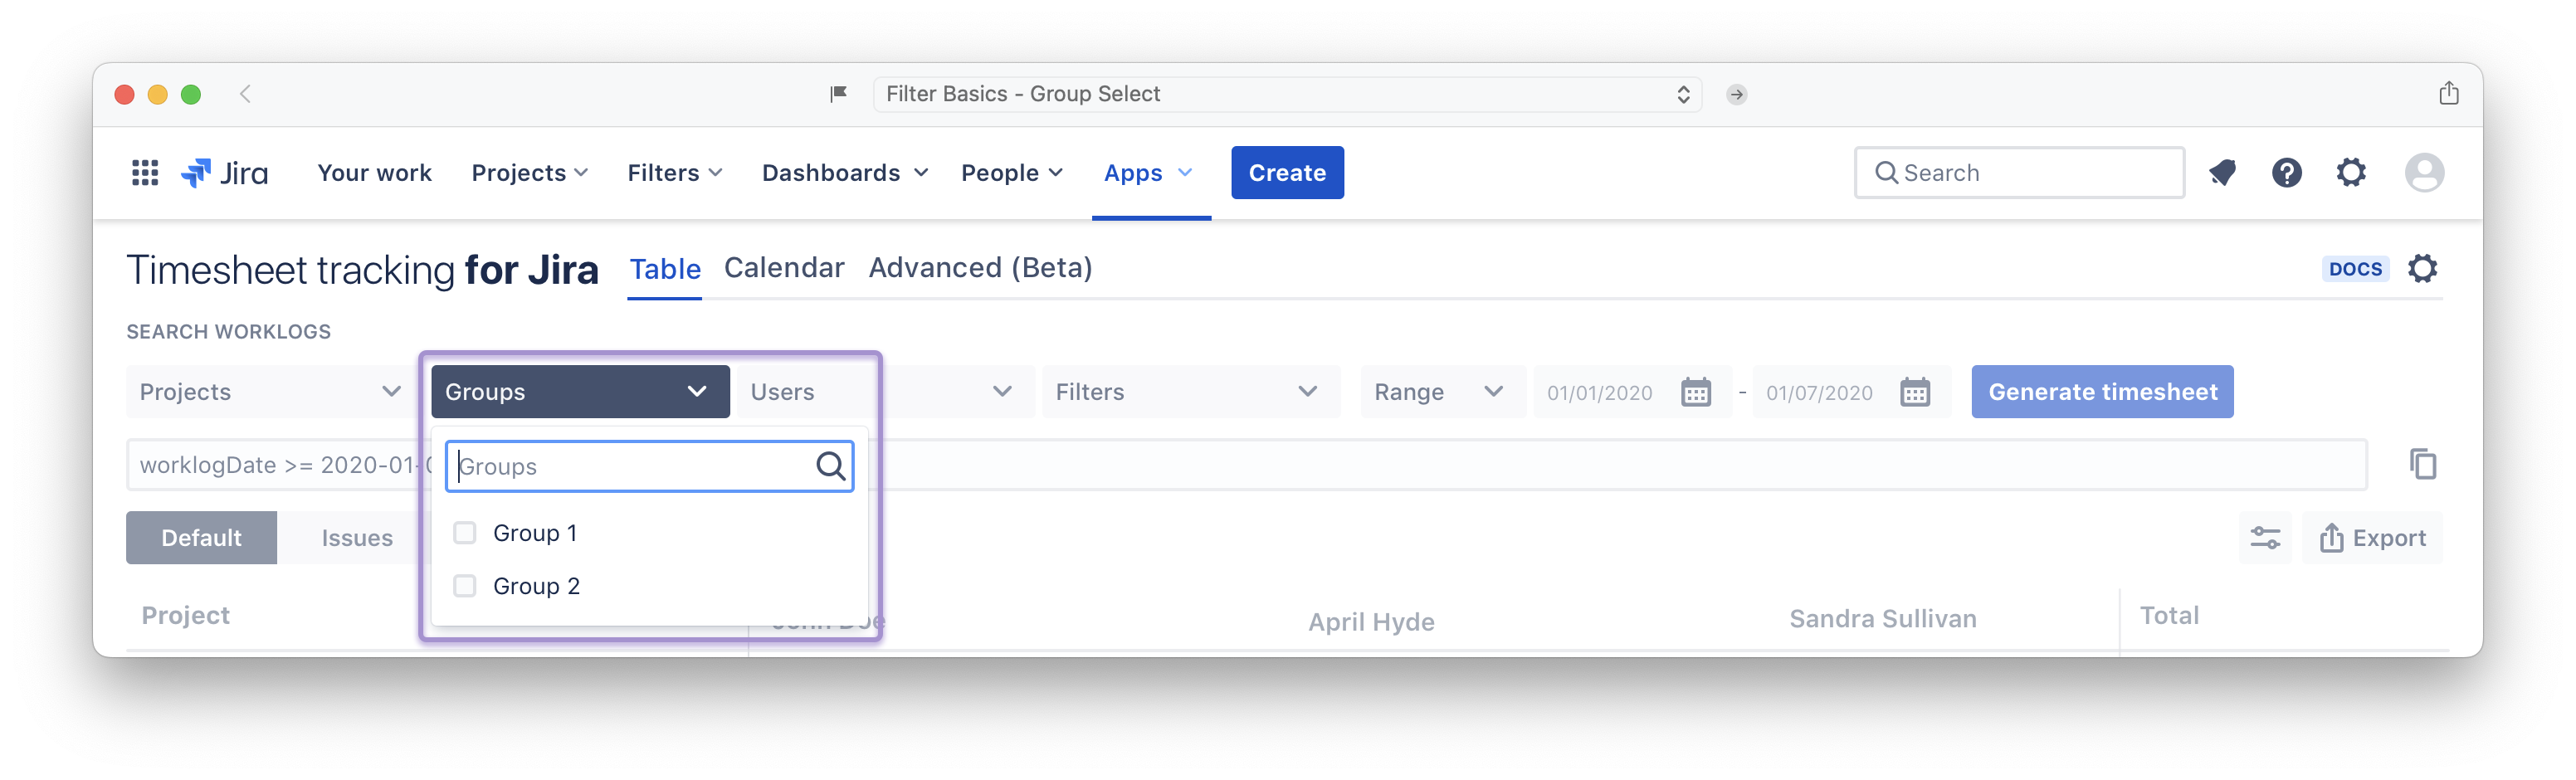
By default, all groups are selected, if you customize this field, User field will be automatically updated depending on groups you use.
User select
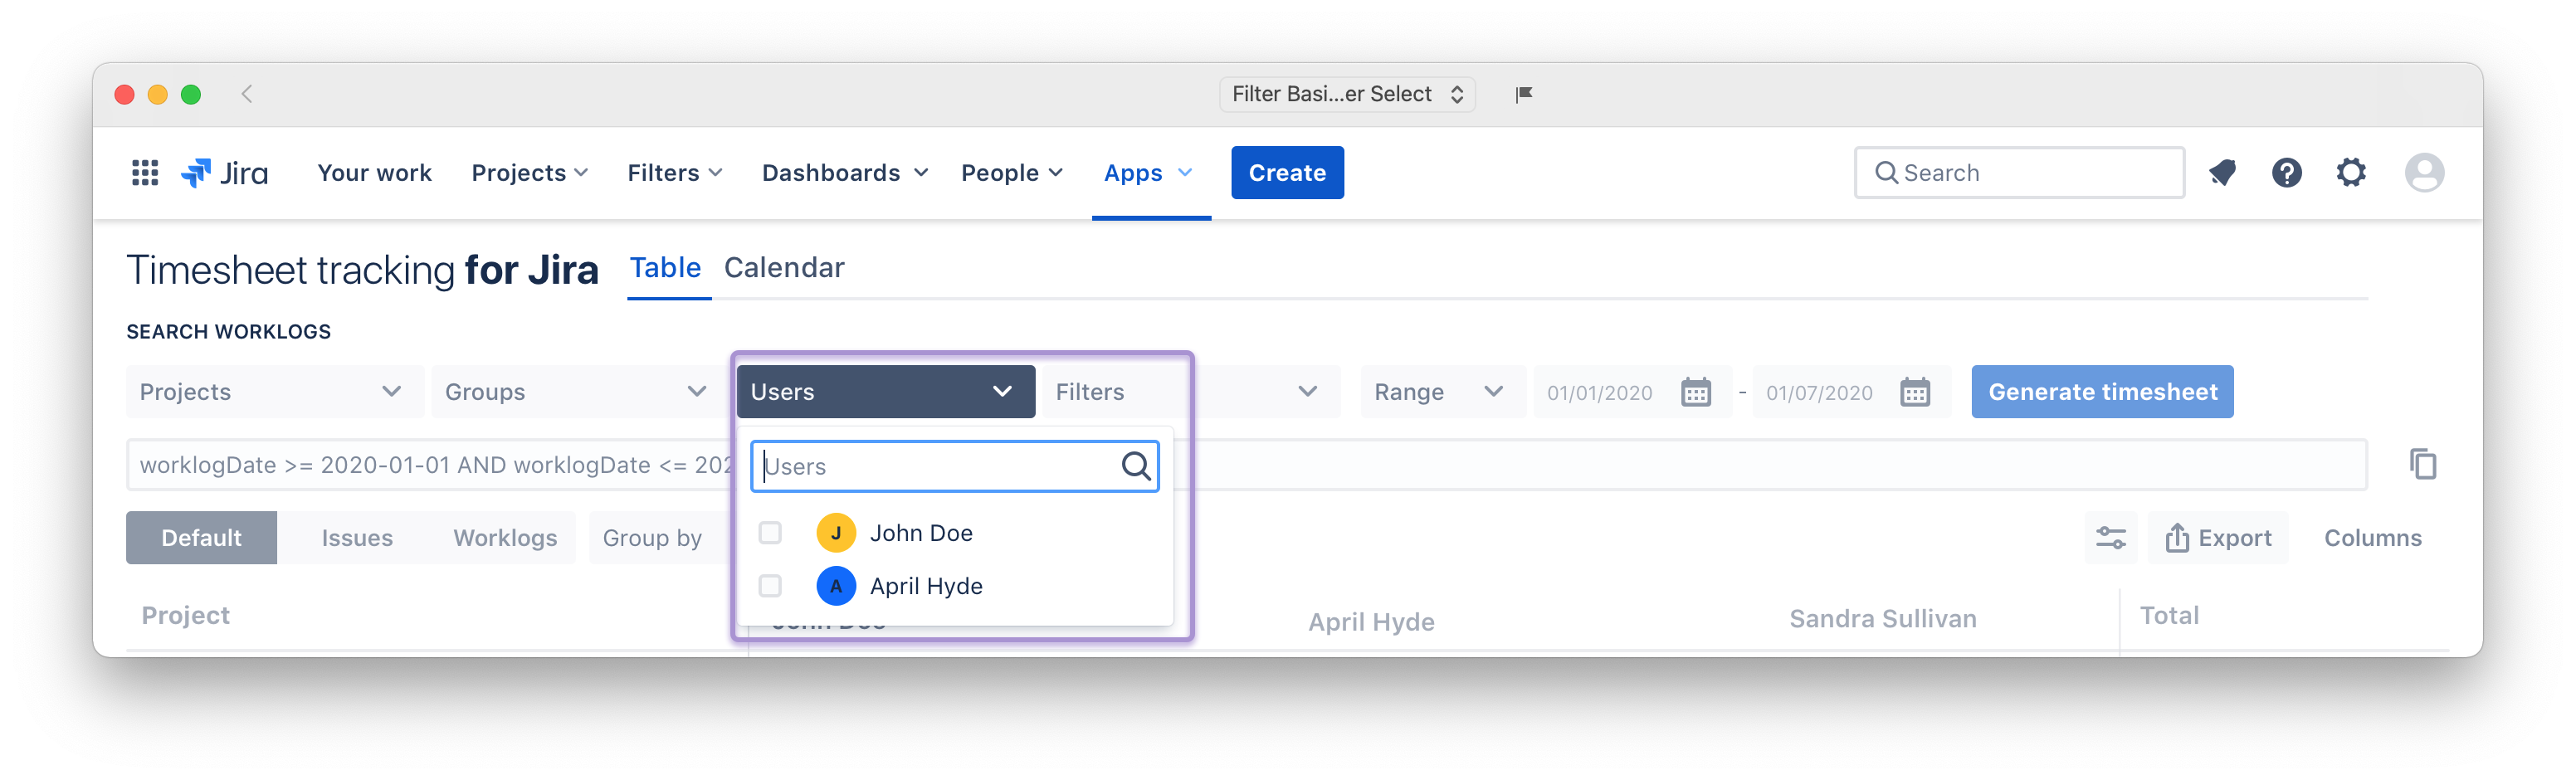
If you want to add some users to your request, or to exclude some of them, you have to use this field. Semi automatic search helps you to find your target.
Filter select (Jira)
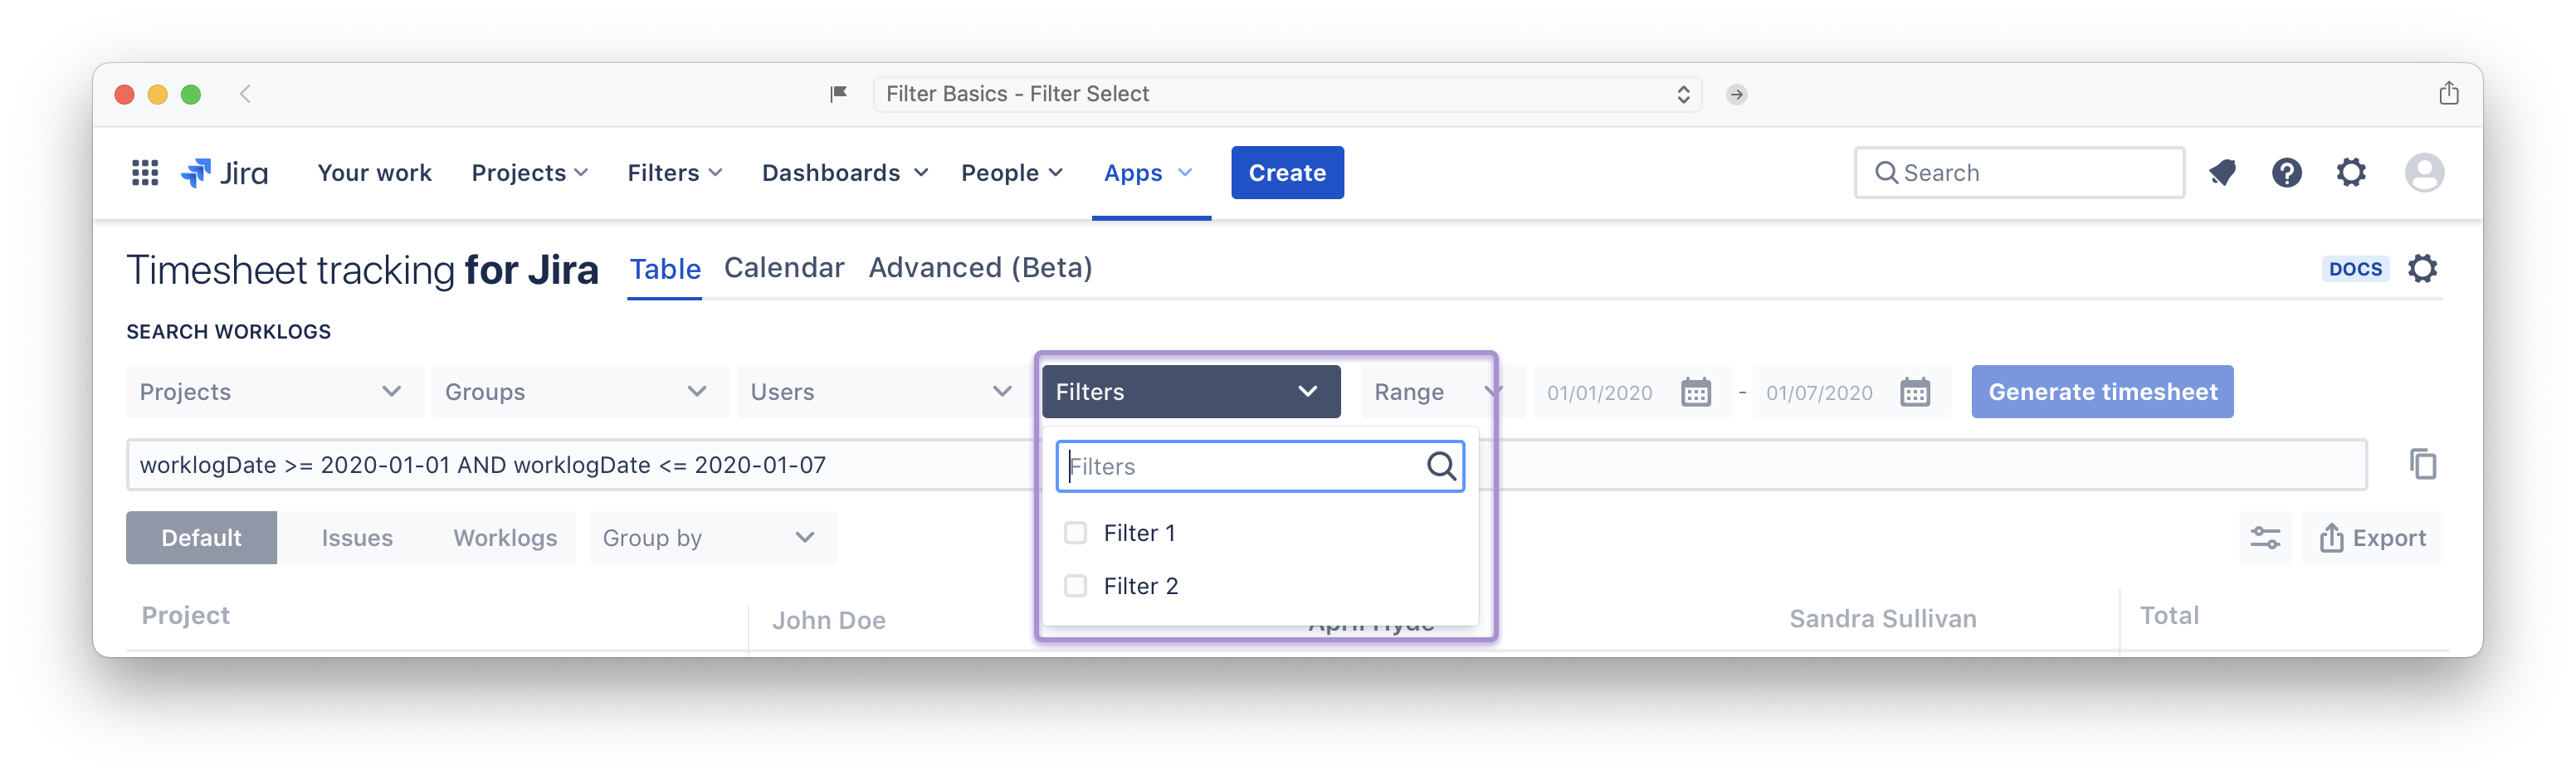
If you want to list worklogs depending on previously saved filter on your JIRA instance, you pick up that filter on this field.
Date-by input
By Weeks:
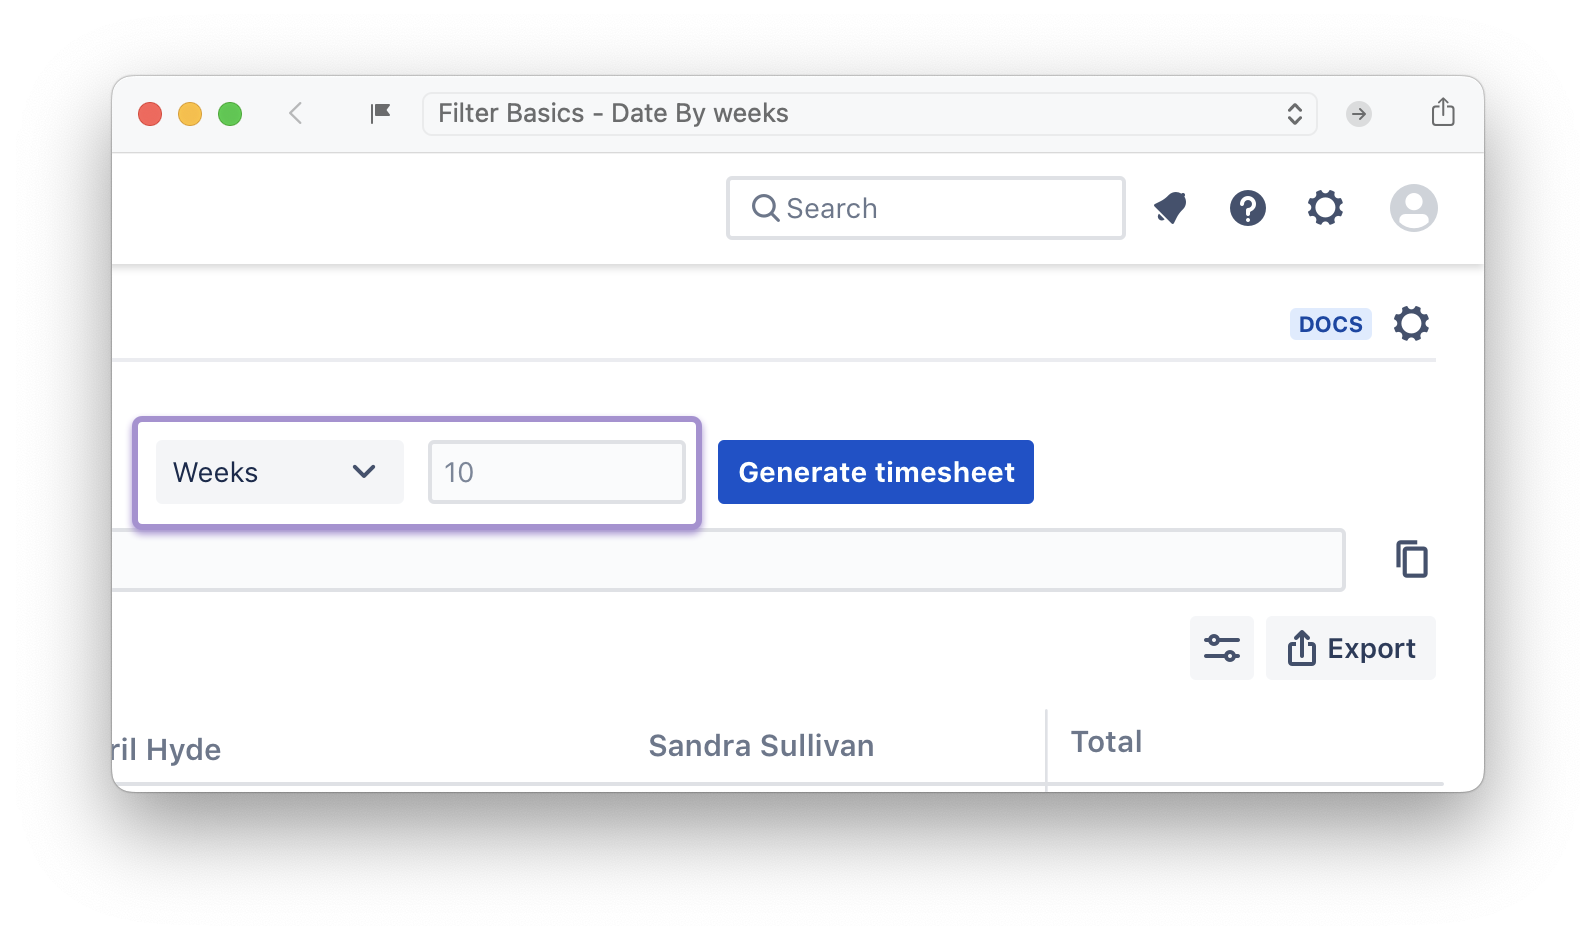
-Can be weeks (- nb) starting from today.
By Range:
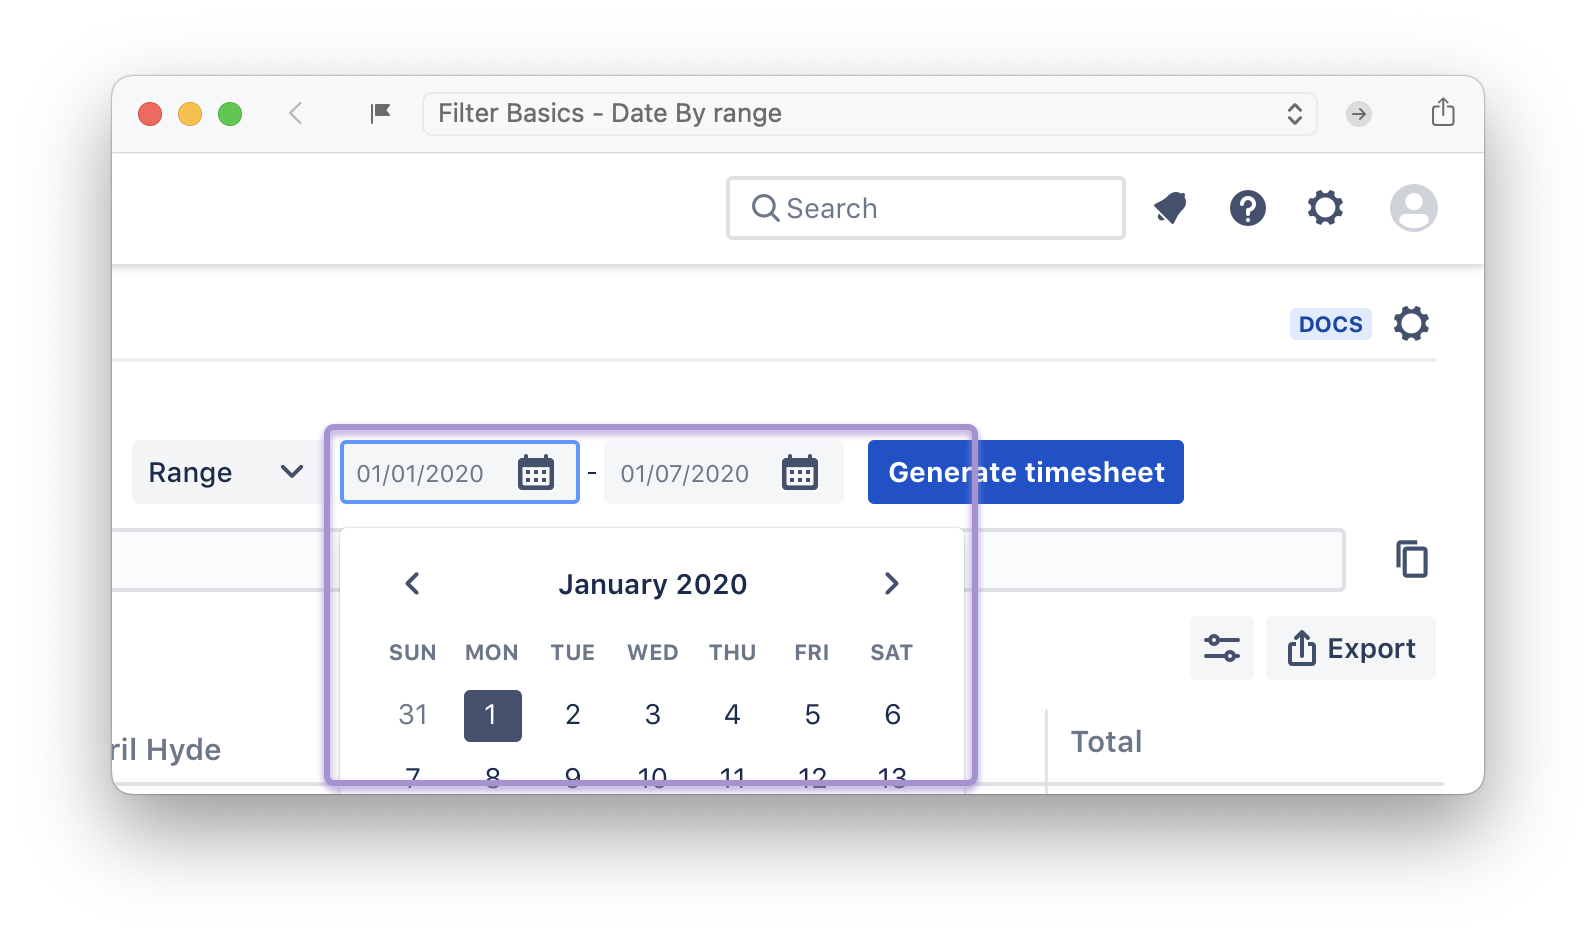
-Otherwise, you can define a date range. No limits for the date range !
Group-by select
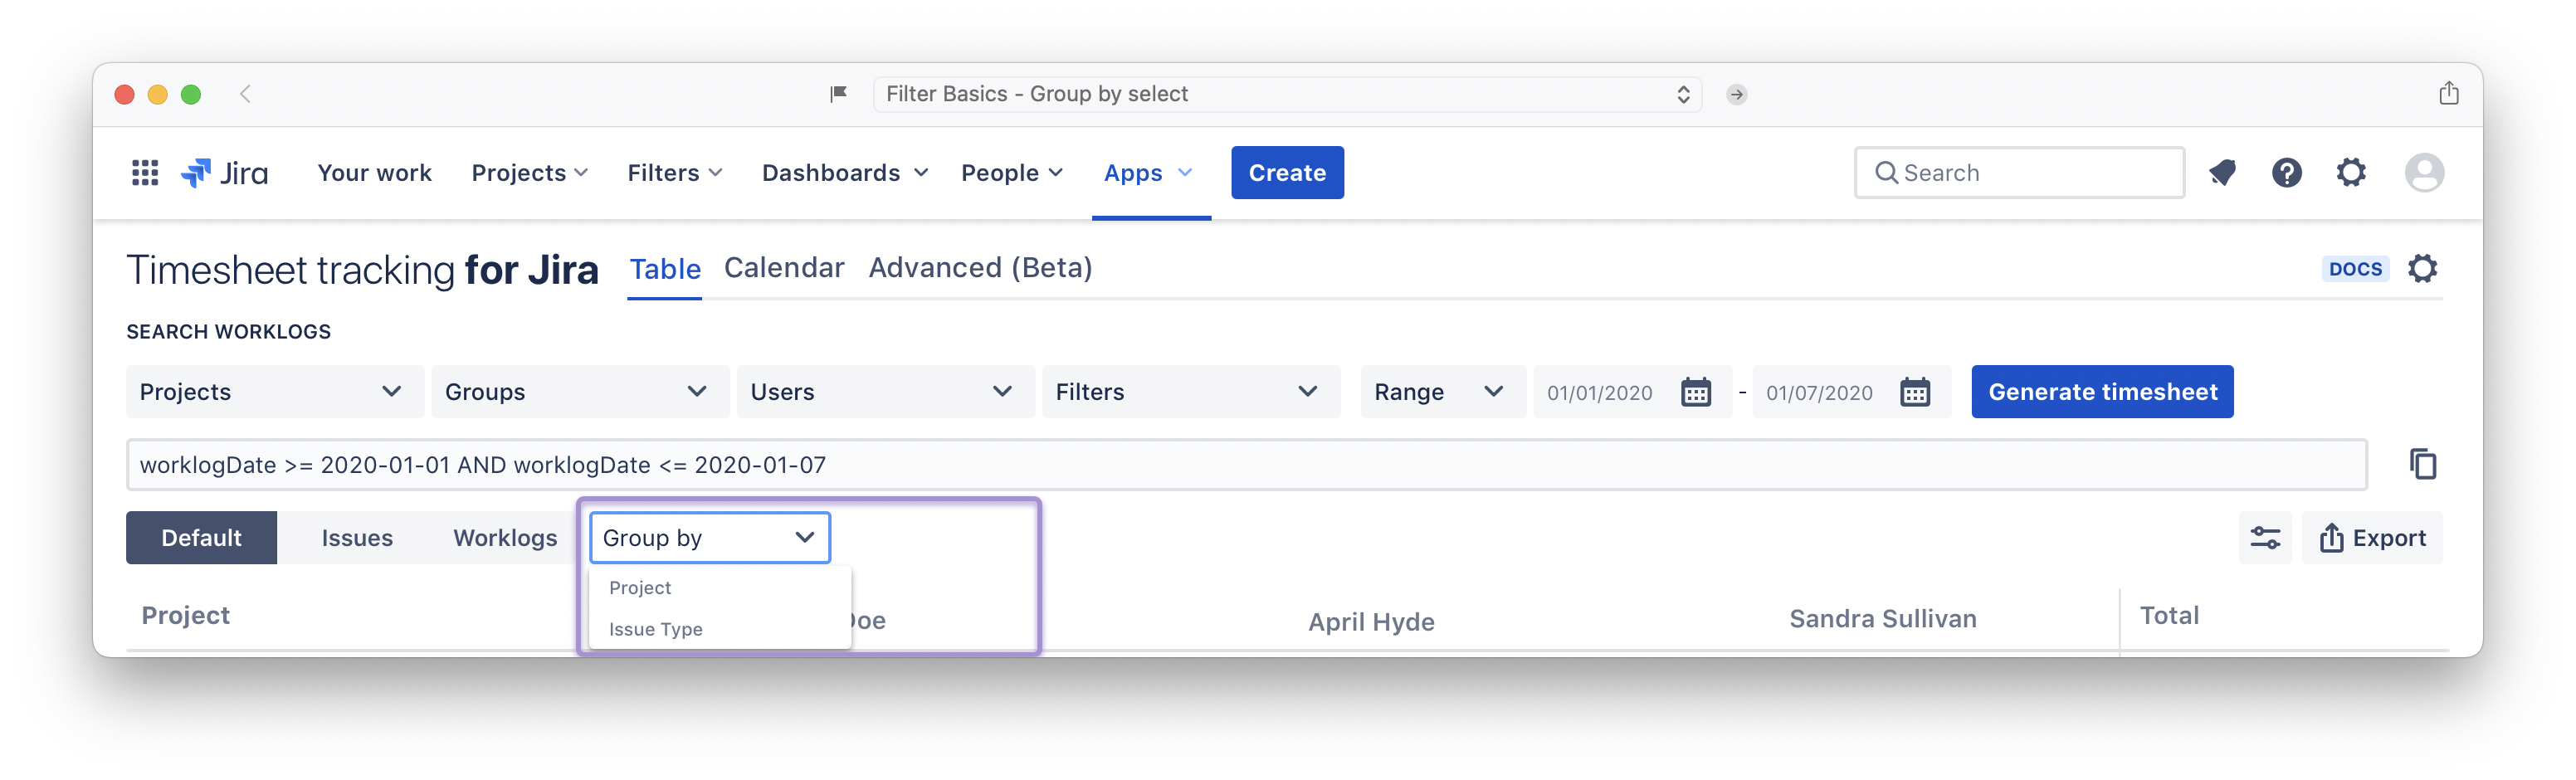
If you want to list worklogs depending on Issue type, assignee, Epic …etc you select that on this field.
Generate timesheet
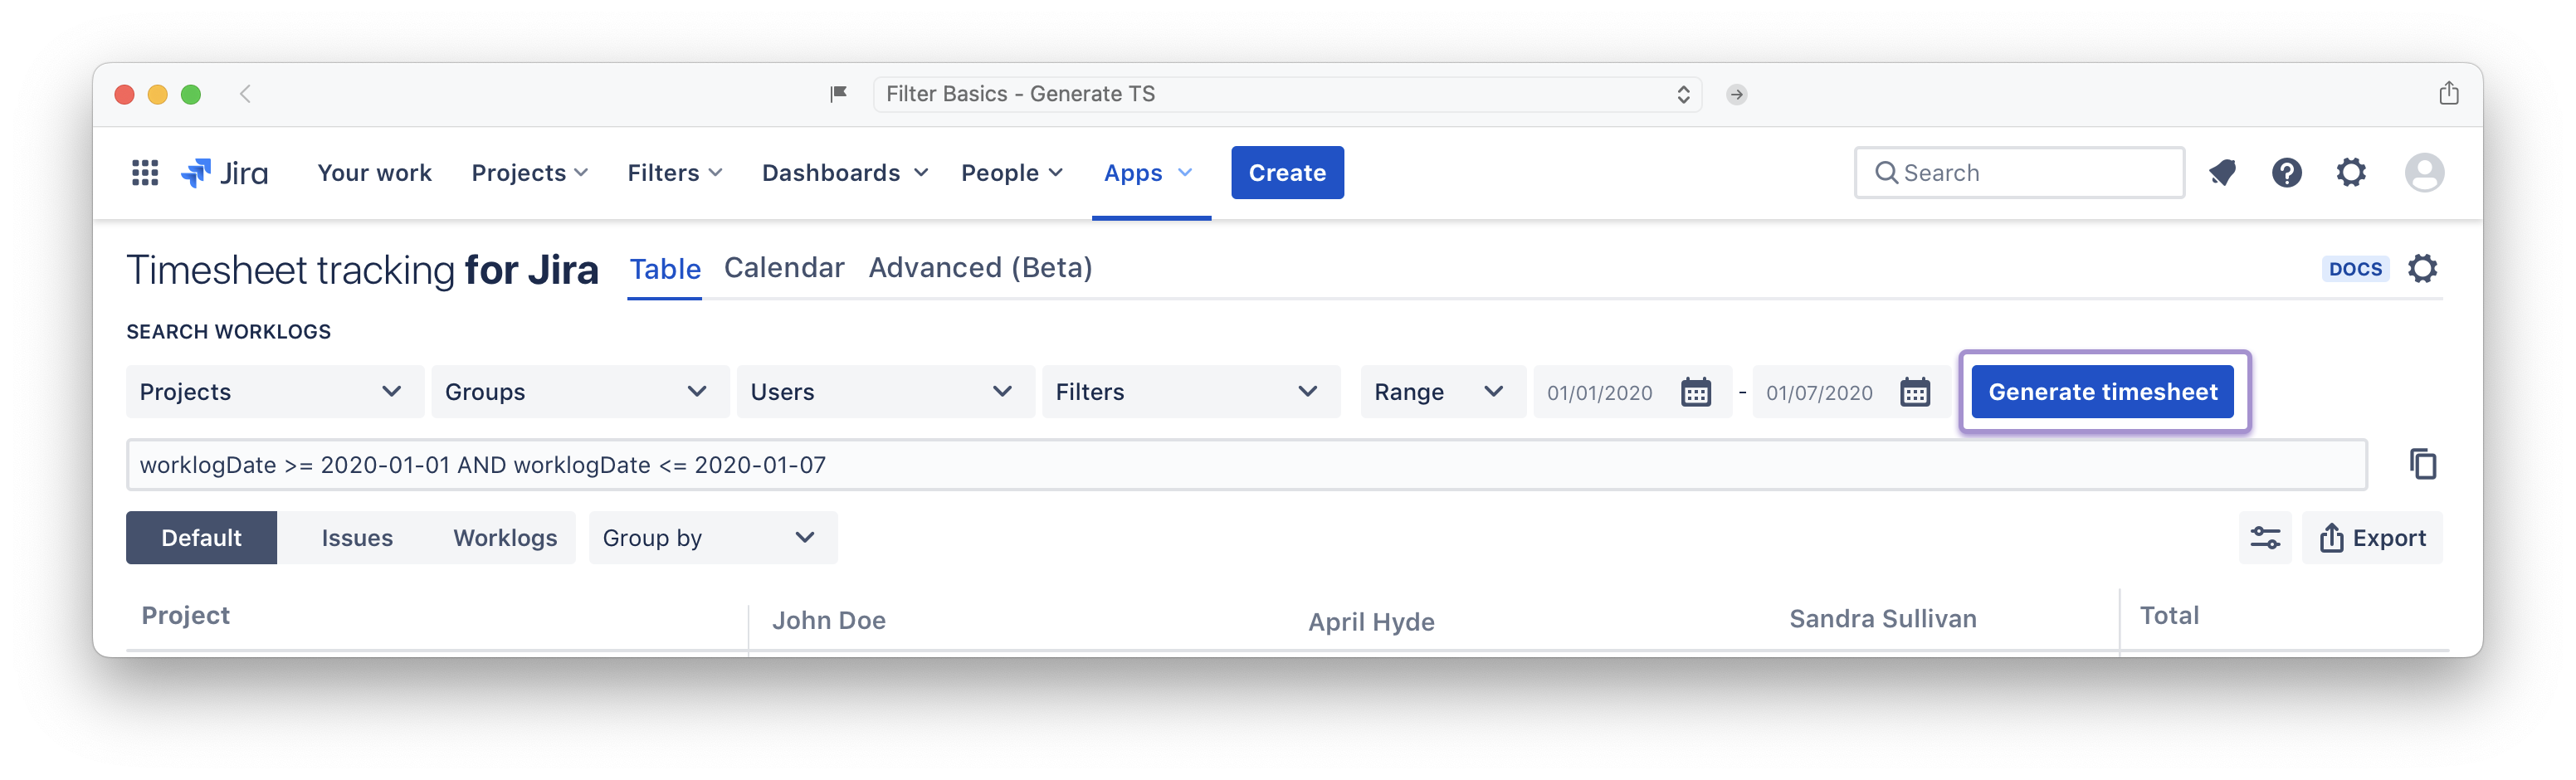
After you have built your filter and you’re happy with it, you click on this button to generate the table timesheet in the form of projects against users worklogs, options are available: Switch to detailed worklogs, generate charts and more.
Show or hide JQL: Toggle visibility of the JQL bar (placed below the filter).
Show or hide charts: Toggle visibility of the charts.
Display by days or by hours : Depeding on your need, you can convert to days or purely hours the data shown in the tables.
Save your awesome filter
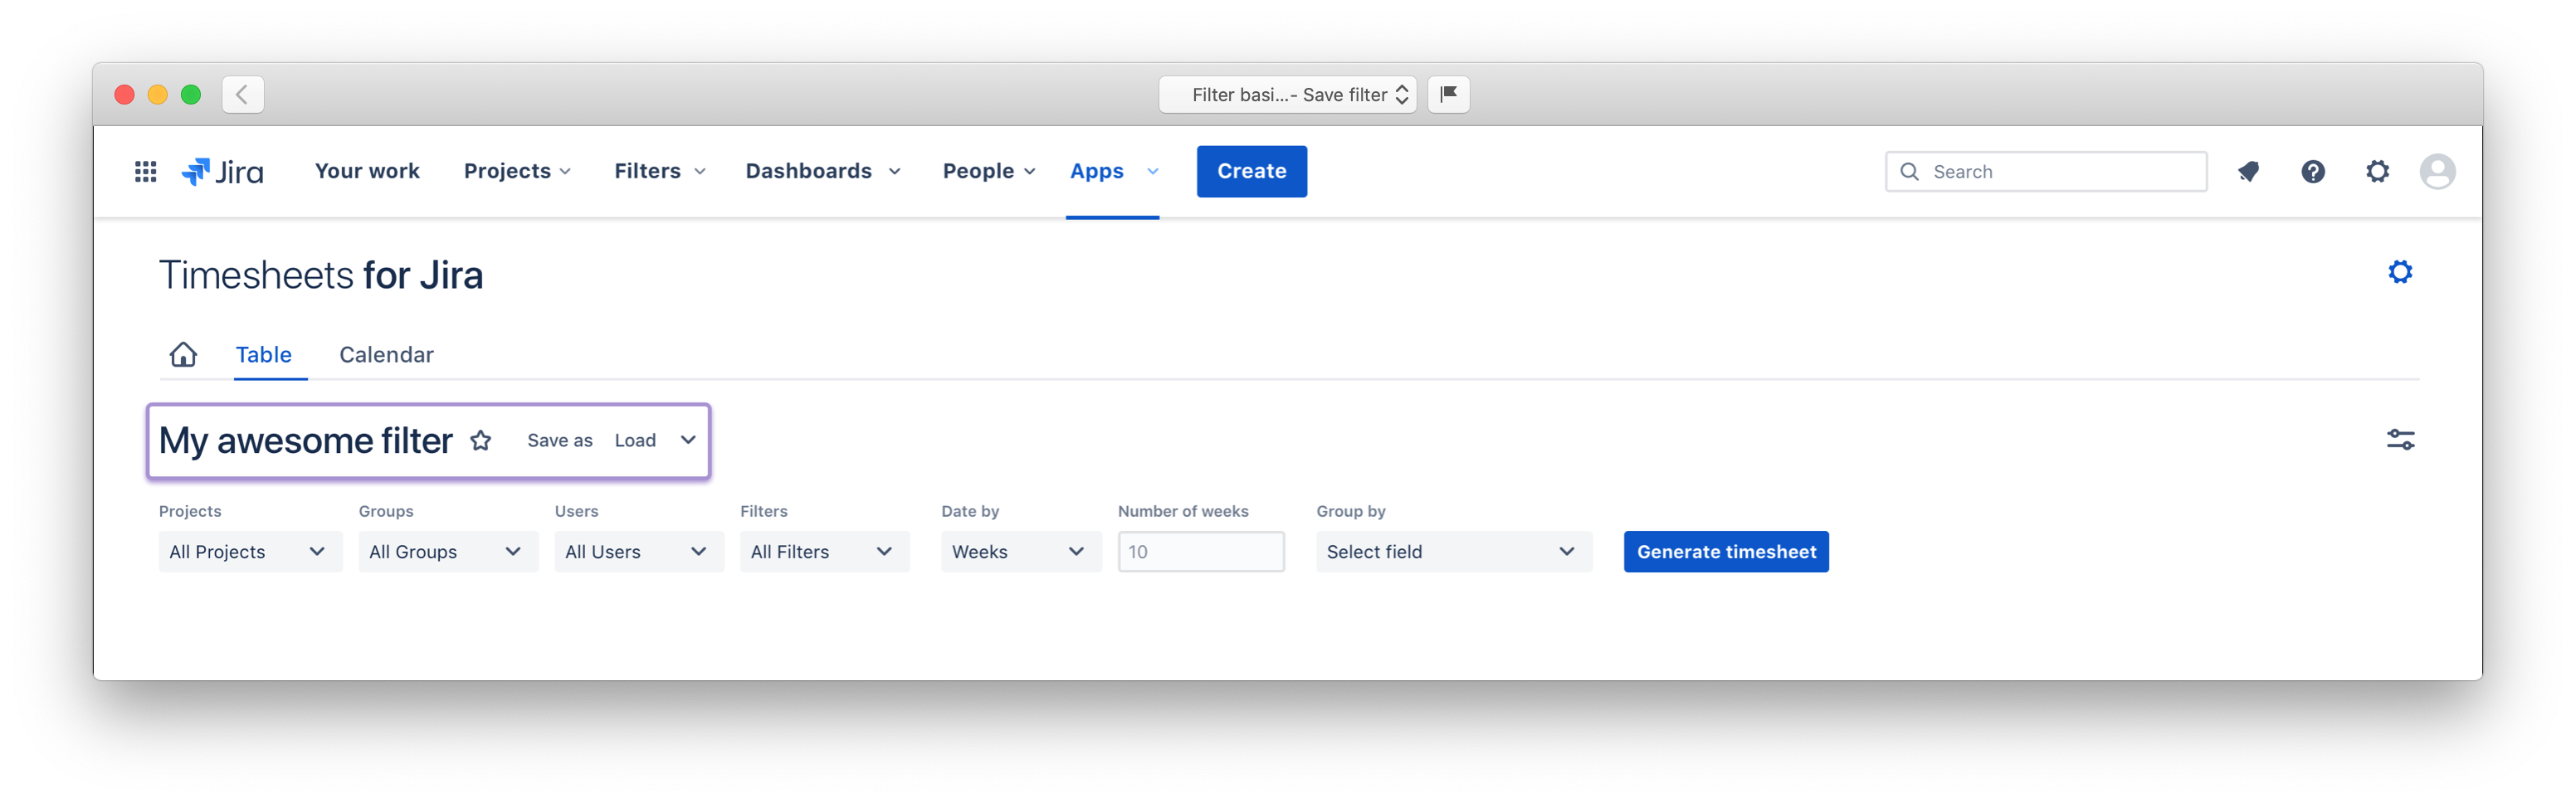
In this section, you can save your filter above to re-use it later quickly. You can modify the request, save modifications or save a new custom report, as well as loading your saved filter.
Access & manage your saved filters
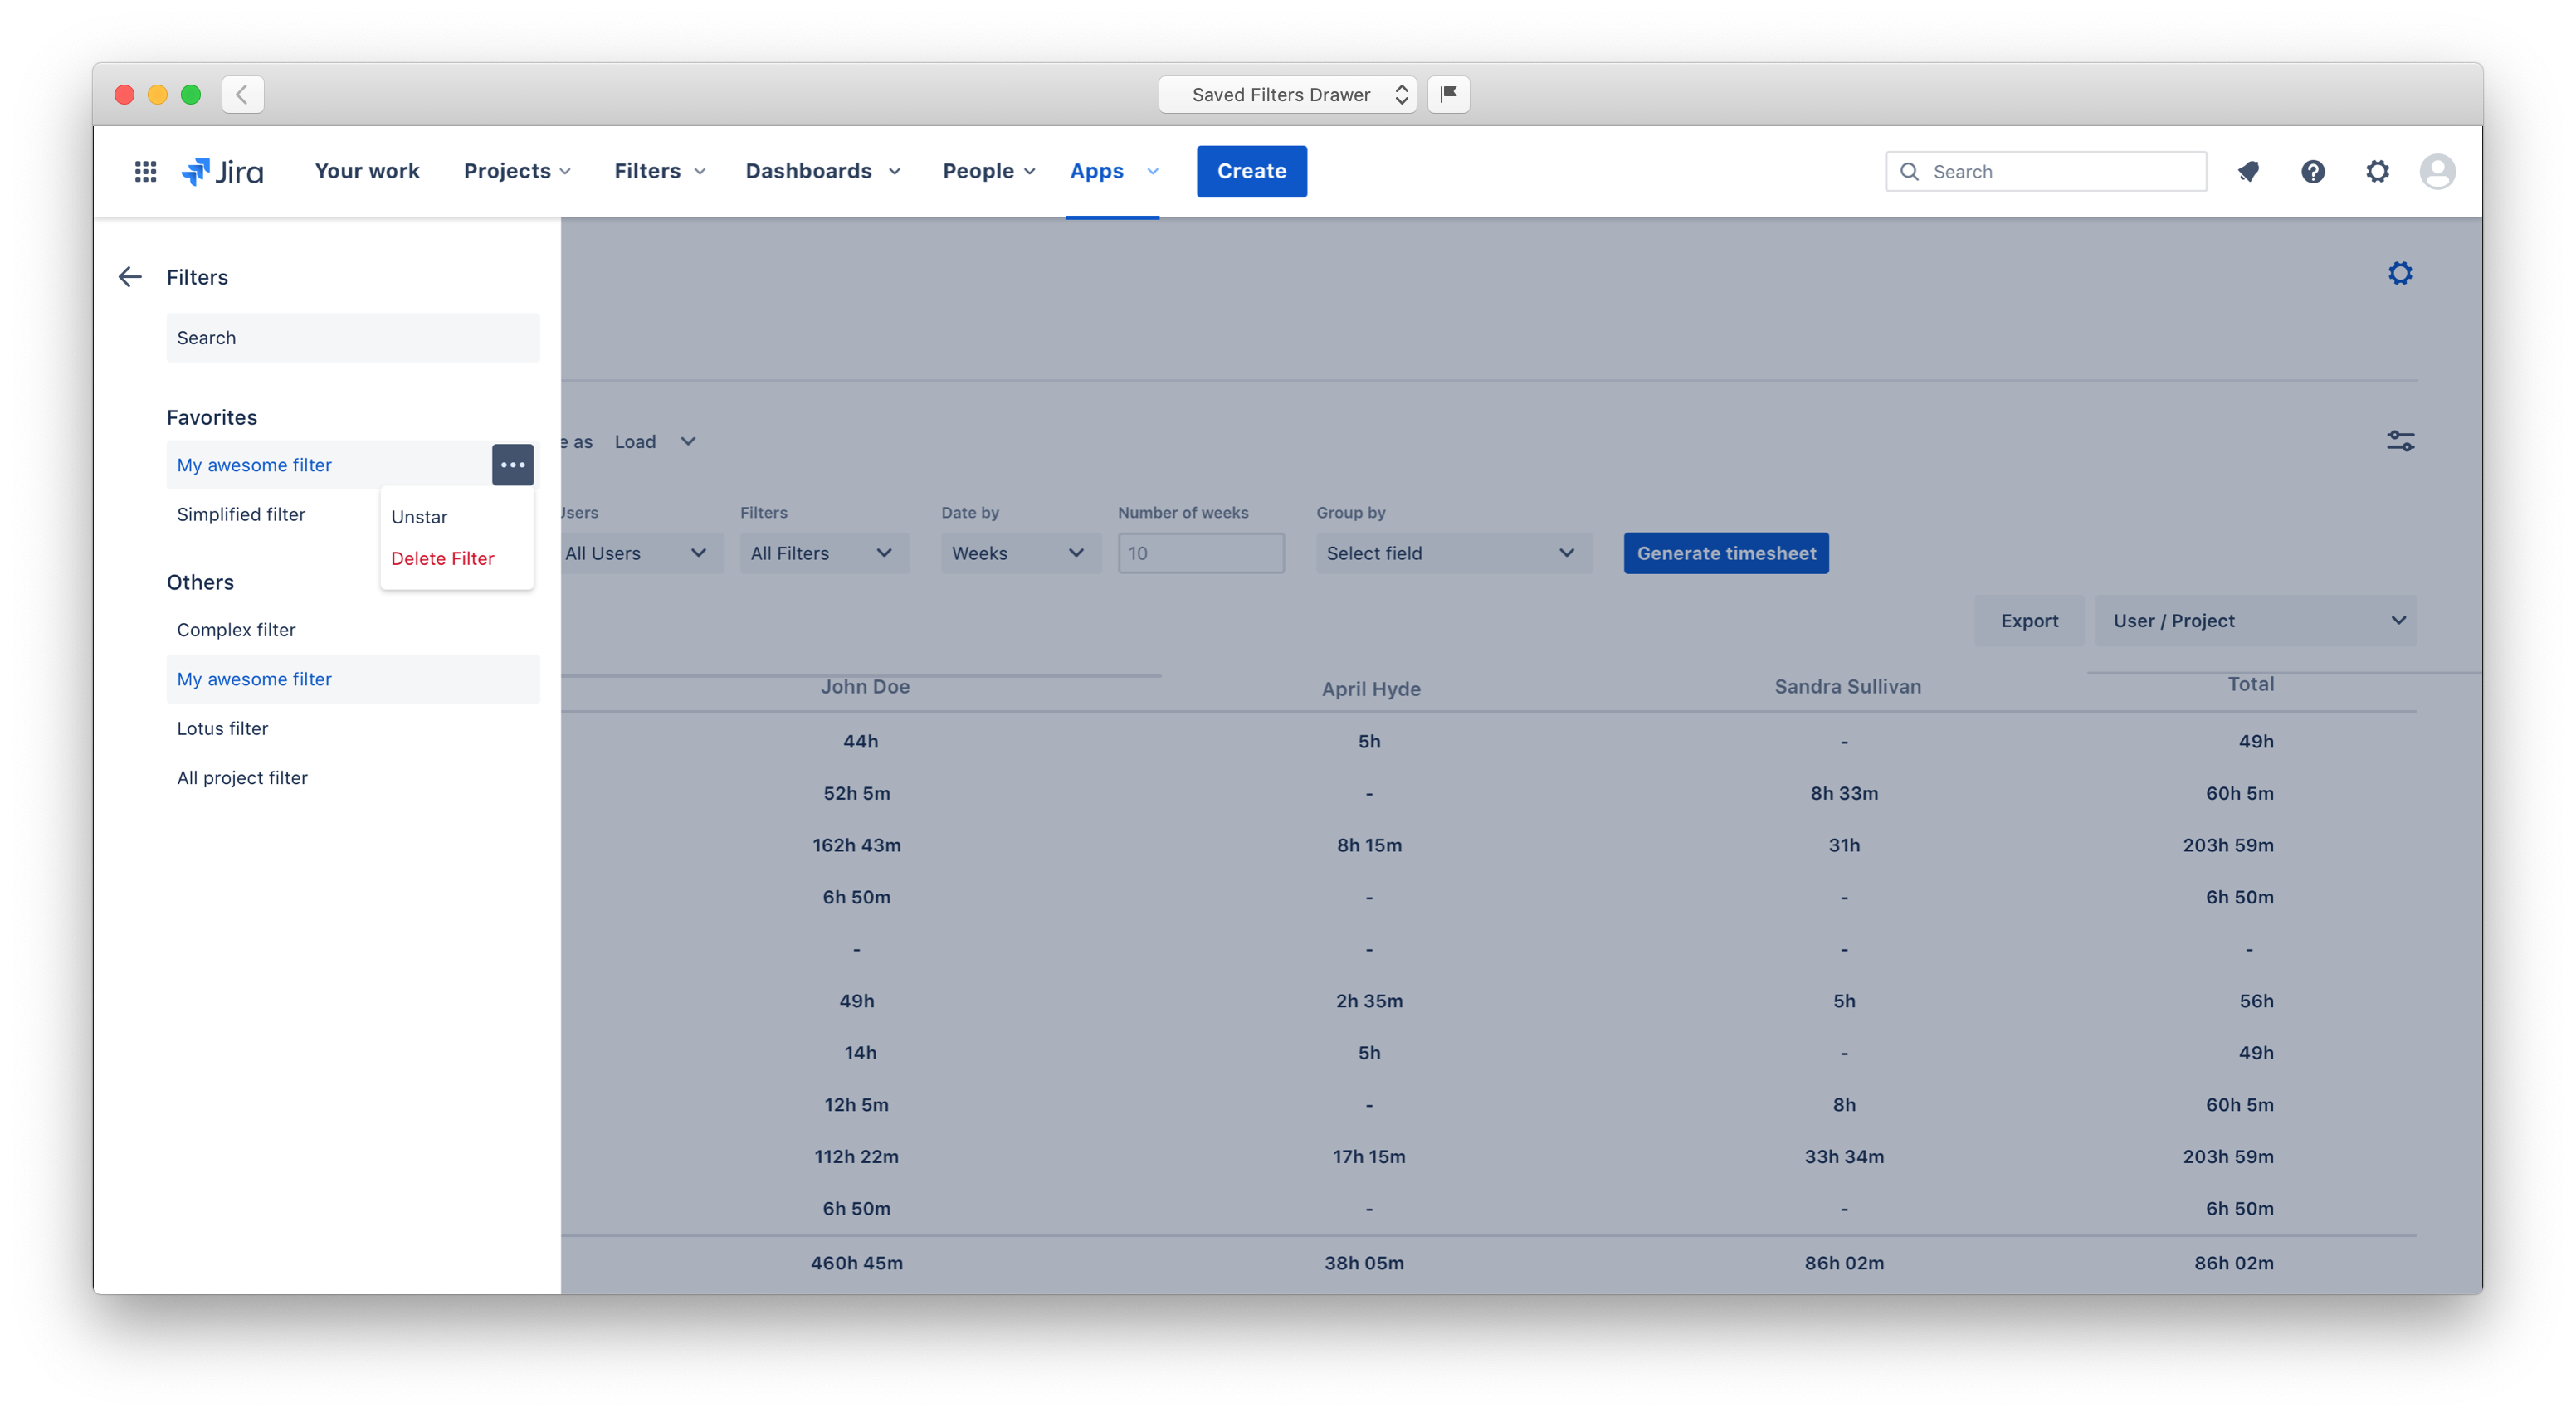
Your saved filters are organized in a navigation drawer (As shown in the image above).
To access this functionality, you simply click on the “load” button in the vinicity of the filter name.
Actions are attributed to every filter. You can delete or unstar them, to do so, you simply hover with the mouse on the filter name and an action button will appear.